January 11, 2023
The ominous Valorant agent Cypher has had his comeback after a much-needed rework. He’s now an expert at defending sites and gathering valuable intel for his team! However, the precise and efficient placement of his utility is crucial to make Cypher shine. With this article, you’ll learn Cypher’s outstanding setups on his best maps, Haven, Pearl, and Ascent!
I didn’t include Bind, as it won’t be part of the map rotation in 2023. Although Split will return to the map rotation, it will also receive some reworks. Therefore, we’ll have to wait for the new patch to develop excellent Cypher setups for Split. With this in mind, let’s jump right into these deadly setups!
Haven
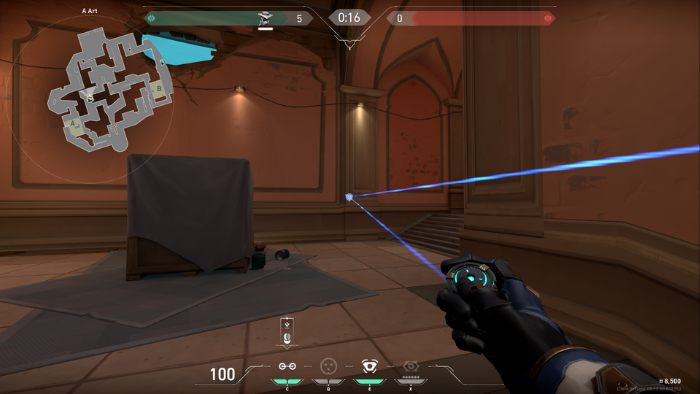
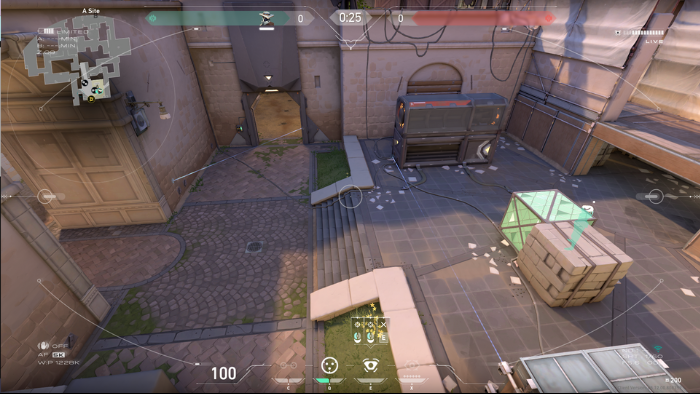
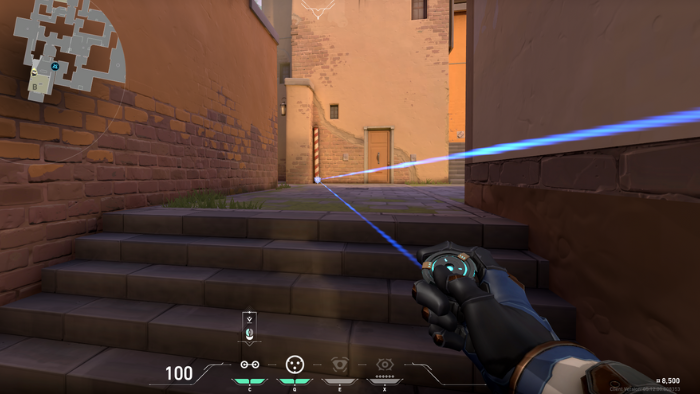
A site
Spycam
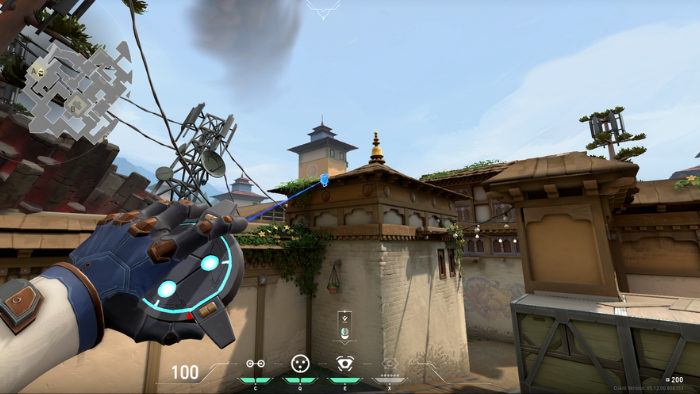
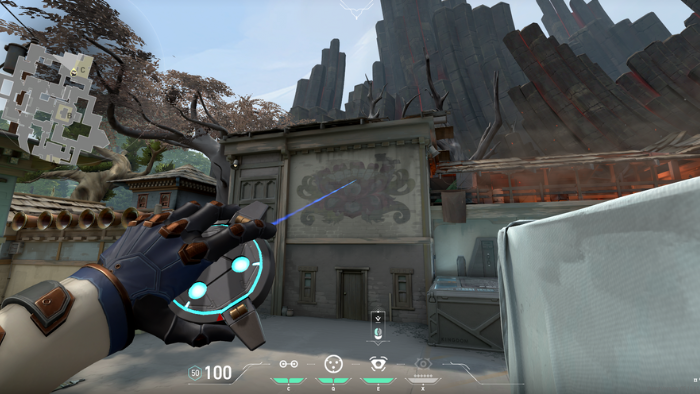
Go to heaven and jump down onto the box in the middle of the site. From there, place your camera on the left side of the A Main entry point. This placement gives you a vision of A site and deep into A Short.
Trapwire
Place your first Trapwire between the right side of the central box and the right wall of A site. It should be at medium height.
The second Trapwire covers the left part of the A site. It spans from the center of the central box to the left edge of the A Main choke at a low height.
Cyber Cage

Both cages can be placed below your first Trapwire, right between the two noticeable lines on the floor.

With this setup, you’ll play from the back of the site while keeping an eye on potential enemies with your camera. Once you see enemy players pushing into the A site, activate your cages and play off your Trapwires to get kills and slow down your opponent.
B site
In general, it isn’t recommended to play on the B site as Cypher. However, you can place one Trapwire on the choke to get information about enemy positions.
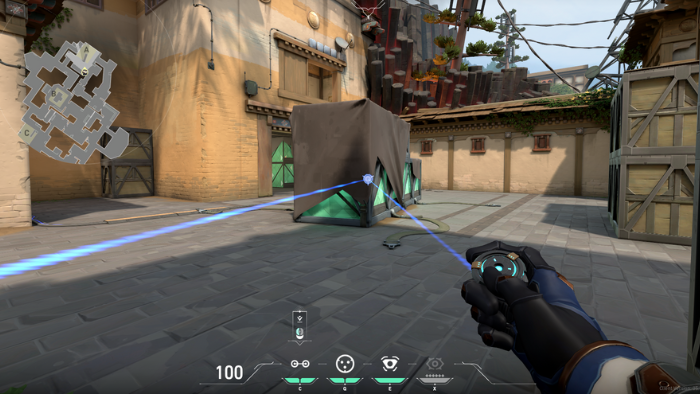
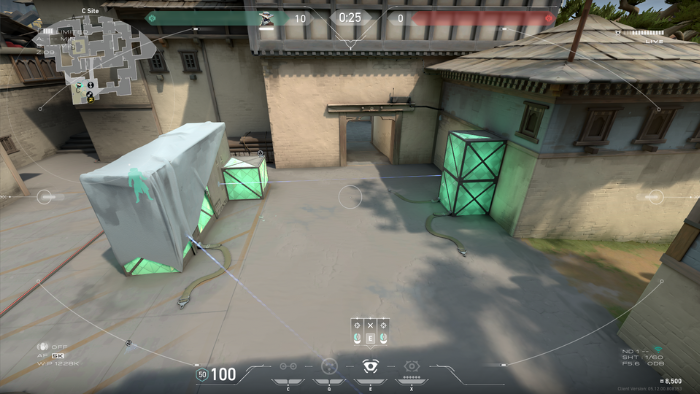
C site
Spycam
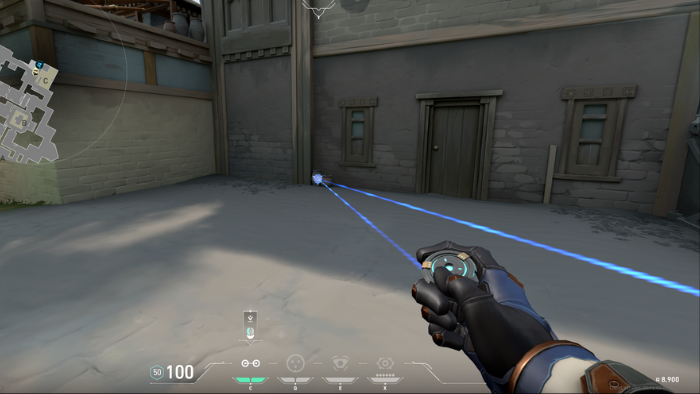
First, jump from the logs on the left side of C onto the box in the middle of the site. Now, you can place your camera on the right wall. This camera allows you to watch over the site and peek into the Garage.
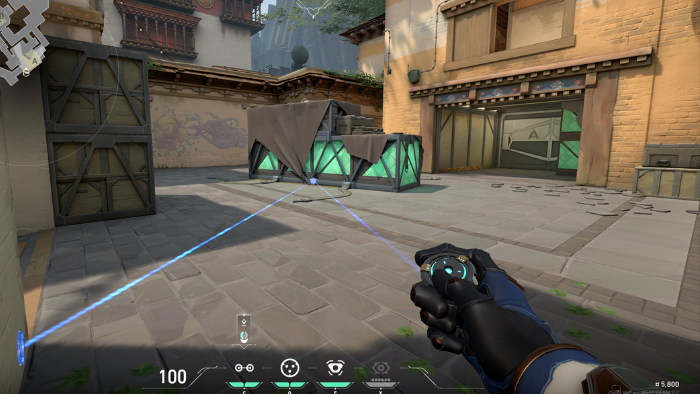
Cyber Cage
Your first cage goes onto the left corner of the same box you are standing on.
The second one covers the choke on the right side of the box.
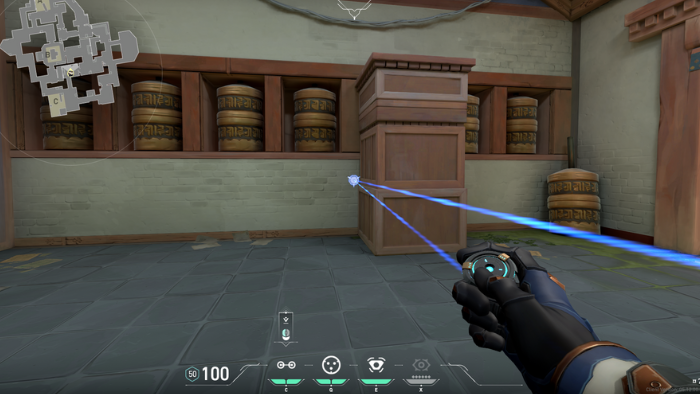
Trapwire
The first Trapwire can be slightly tricky to place. It spans from the pots next to the right wall of the site to the central box. The pots are near floor level, while the Trapwire reaches medium height on the box.

Place the second Trapwire between the central box and the left side of the small box near C Main.
At the start of the round, play from the back site and gain early intel with your camera. If your opponents enter the C site, slow them down with your cages and Trapwires or get easy kills on revealed players.
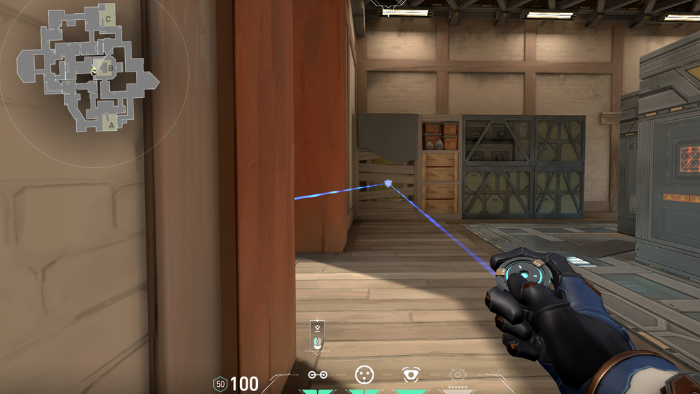
Garage
The best setup here is a Trapwire across Garage hidden by the wooden box.
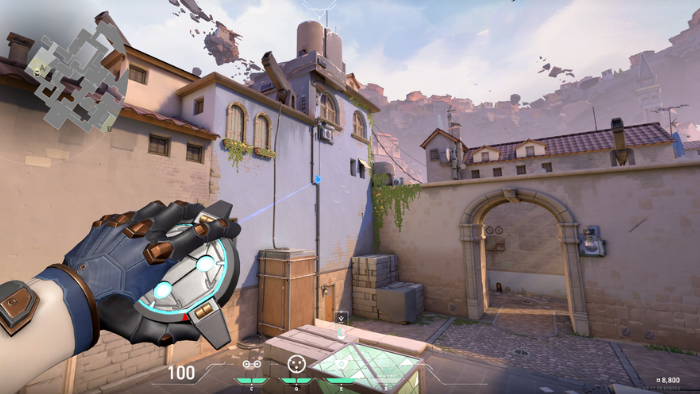
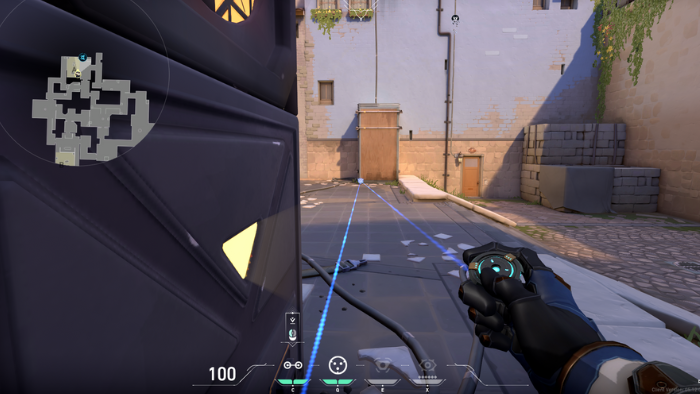
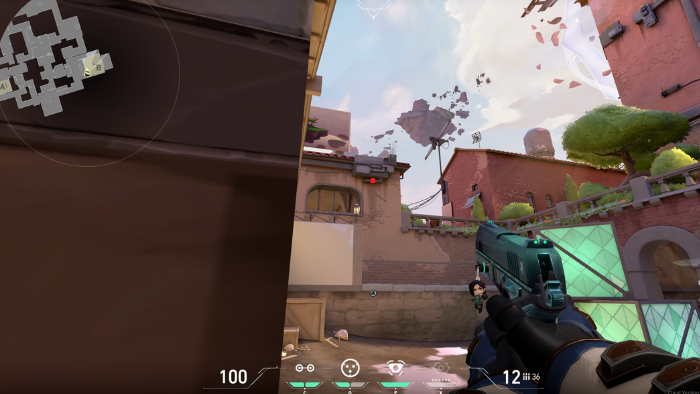
Pearl
A site
Trapwire
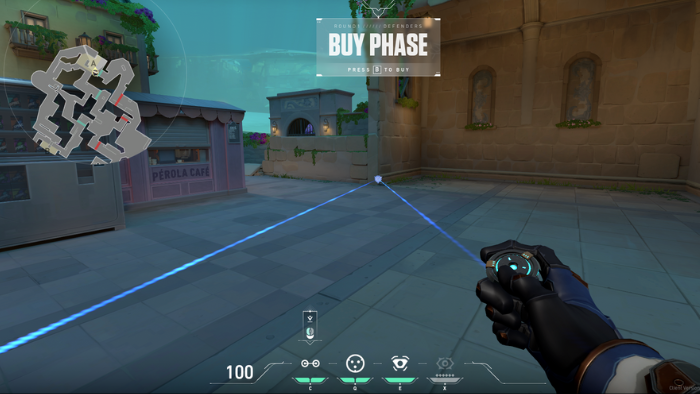
This first Trapwire is phenomenal and can be used almost every round. It covers most of A site and inconveniences opponents pushing A Main.
For the second Trapwire, go to the left side of A Main and face the bright mark on the gray wall on the right. The wire spans across the site and almost reaches the corner on the left of Main.
Spycam
Your camera goes to the upper left of the A Main entrance. However, it can only be placed high enough from the top of the Perola Cafe in the middle of the site. To get there, jump on the grey wall near B Dugout. Then, gain momentum by running from the end of the wall towards the back site (the box should be on your left). Mid-momentum, turn left and hop onto the Cafe. Here, you can reach the illustrated camera position by jumping.
Cyber Cage
Finally, drop one of your cages between the Perola Cafe and the wall to its left. Keep your second cage for mid-round usage.
This setup enables you to play from B Dugout. First, gather intel with your camera and reveal enemies with your utility. Then, wallbang them for easy kills. Your cages will grant your cover if you need to change position.
B site
Spycam
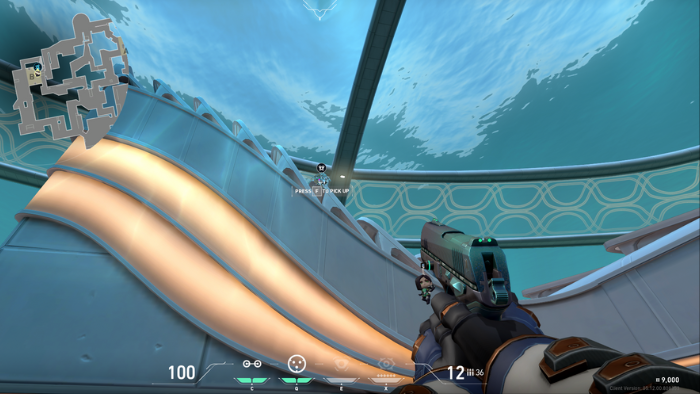
Start your setup by walking to heaven and standing at the right corner of the bridge leading to the site. Look towards the wave-shaped roof of the back site. Jump and place your camera on the top of the third wave (counting from right to left). It might take some practice to get the hang of this. However, it’s certainly worth it because this camera shows you most of the B site as well as the chokes on B Main and link.
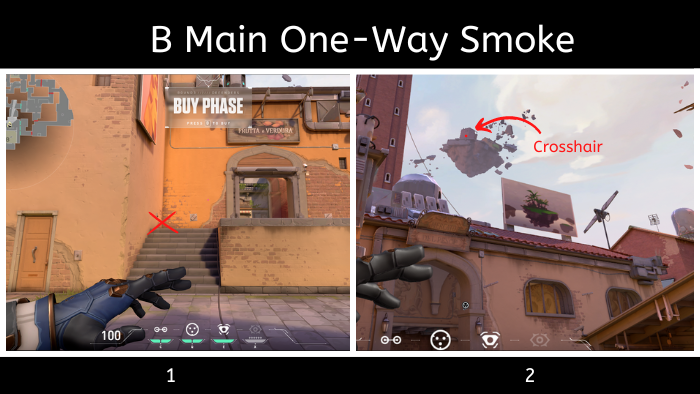
Cyber Cage
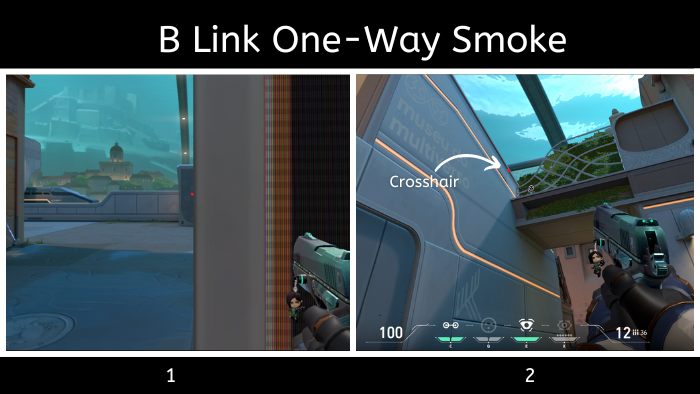
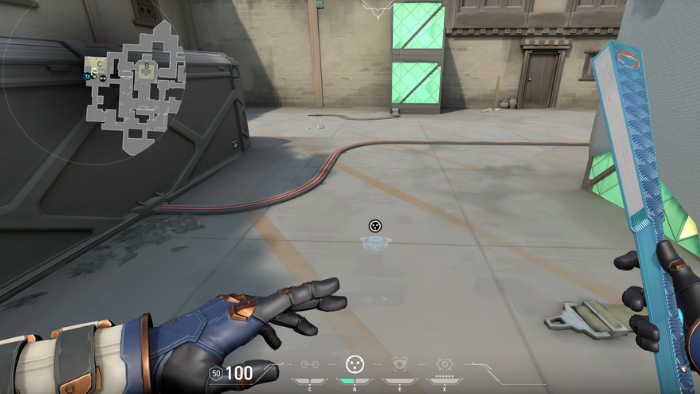
Next, we’ll place a one-way smoke towards B Link. Jump down and stand right in front of the pillar in the middle of the B site. Align your crosshair with the left side of the pillar and the box in the background, as shown in the graphic above. Then, look towards B Link and notice the subtle set of vertical lines on the left-side museum. Place your crosshair at the very top of the second line (counting from right to left) to throw your cage. As you can see in the graphic, your cage will land on the ledge above the B Link choke.
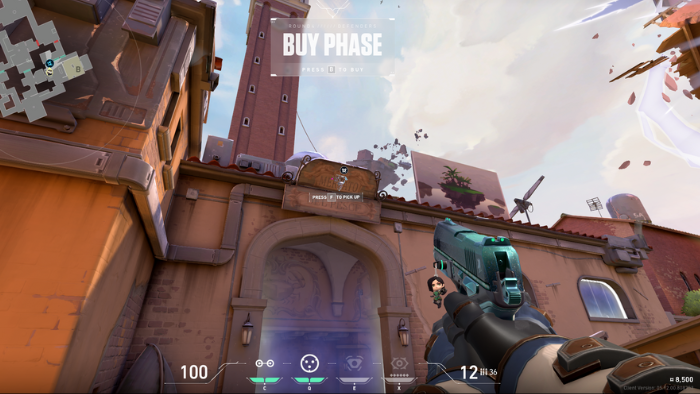
Your other Cyber Cage will be a one-way smoke for B Main. Go around the corner of the building left of B Main. Walk up to the building and face upward. You can throw your cage with your crosshair placed between the fourth and fifth tile (counting from left to right).
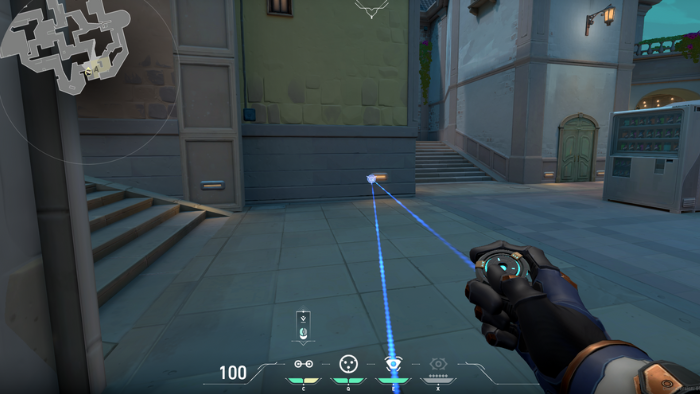
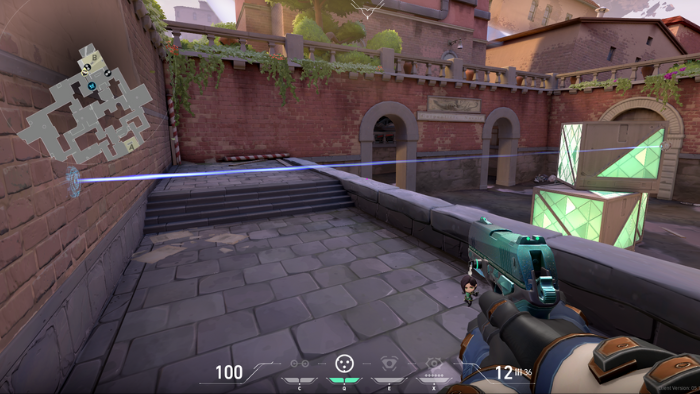
Trapwire
Your first Trapwire will cover B Main. Aim for a low height where the horizontal and vertical lines of the tiles meet in the graphic.
Now, walk back around the corner where the default plant spot is and face the same building. Here, you place a Trapwire connecting the right corner of the building and the upper half of the gray box.
This setup can be challenging to execute quickly. But once you’ve mastered it, position yourself in B Hall while watching all entry points with your camera. Activate your one-way smokes according to your intel for easy kills. You can also deny a plant on default with your second Trapwire.
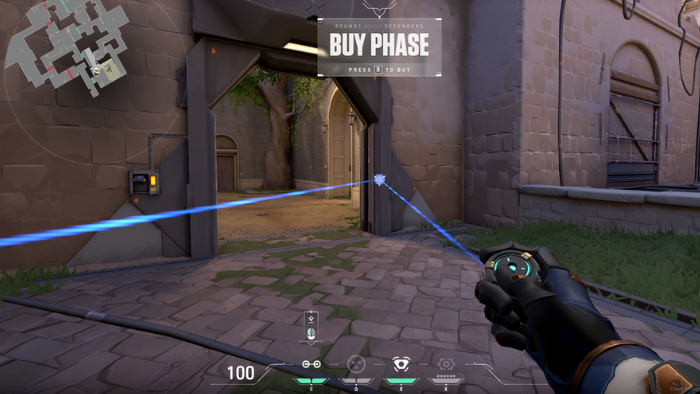
Art
If you’d like to gather information about enemy movements from art, place a Trapwire across it at medium height.
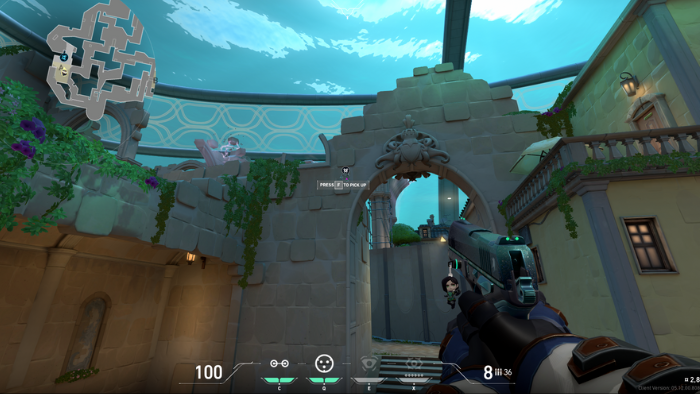
Ascend
A site
Spycam
Start by going to heaven and positioning your camera on the left wall of A site. This will give you a vision of the site, A Main, and A Tree.
Trapwire
Your first Trapwire goes across almost the entirety of A site. Only the right side of the Generator will be uncovered. Place it on the lower left corner of the wooden box.
The second wire covers pushes from A Tree and enemies going for the door switch. Put it on the right side of the door at a medium height.
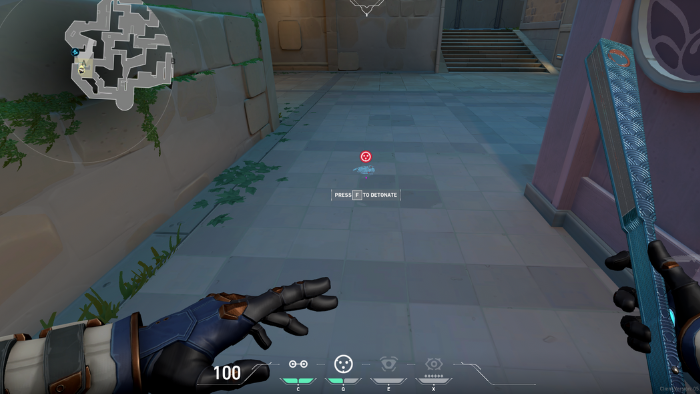
Cyber Cage

Your first cage will make a one-way smoke for A Main. First, go to the small staircase in the middle of A site. Notice the small patch of grass on the right side of the staircase. Crouch and adjust your position, just as shown in the graphic. Now, turn towards the arch of the A Main entry point. Align your crosshair with the upper left line of the arch as indicated. Finally, throw your cage.
At the start of the round, play from behind the small green box in the middle of A site. From there, you use your camera for intel. If someone pushes A Main, activate your first cage for an easy kill. You can also use your second cage on the right or left of the small box, according to your situation.
B site
Cyber Cage 1
We’ll start with a one-way smoke for B Main. First, tuck yourself into the corner left of Market. Crouch and look up at the floating building. Match the crosshair placement of the graphic and throw your cage. It will land on the right side of B Main arch.
Spycam
Next, walk up to the sign above the arch. Jump to place your camera at the center of the upper sign. This allows you to peak onto B site and B Main.
Trapwire
Go to B Lane, crouch, and face the left wall. While doing so, crabwalk towards the right with your Trapewire out. The moment the wire turns from red to blue, place it. The result is a Trapwire across Lane and half of the plant area.
Your second Trapwire will protect you from opponents pushing CT or B Stairs. To place it, look at the bottom of the candy cane near CT.
Cybercage 2
From B Stairs, hug the wall of B Switch and place your crosshair in the middle of the small pipe near B Lane. Throw your cage to gain cover from B Lane pushes.
At the start of the round, stay in B Stairs as you spy through your camera. In case of a push from B Main, play off your one-way Cybercage. Then, you can either activate your other cage from Stairs or give up the site and play from Boat House. Take advantage of your Trapwires to slow down your opponent.
Final Words
I hope these setups gave you more confidence in your Cypher plays! Still, your setups shouldn’t be identical every single round. Variety and adaptability are vital to outplaying your opponents with Cypher. Therefore, I suggest checking out all kinds of resources to adopt new fun Cypher tricks. If you now feel inspired to learn about other Sentinels, then check out our Killjoy guide!