March 26, 2023
Discord is an amazing platform for all kinds of communities. It allows gamers, artists, and friends to connect easily. Discord servers are excellent for nurturing a community as a streamer or aspiring community manager. What channels, bots, and rules should your server have?
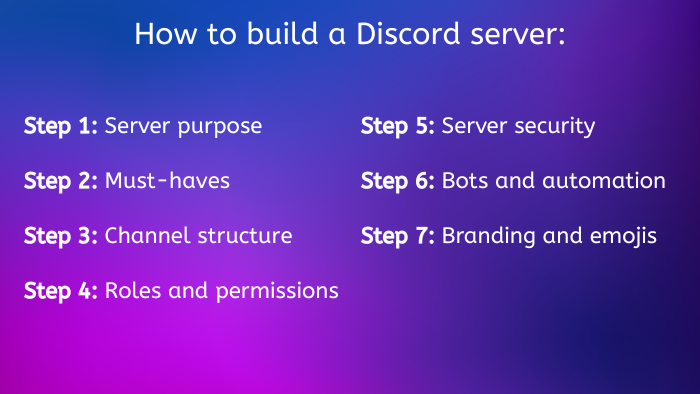
Step 1: What’s your server’s purpose?
The first thing to understand is that no Discord server is the same. Some might be similar, but they all serve different purposes and communities. With that comes different needs, channels, activities, and structures. That’s why you need to identify its purpose before building your server.
First, ask yourself, “What’s the main purpose of my Discord server? What will it be used for?” Here are some examples:
- A community hub for a content creator
- A hub for a brand/game/esports organization (e.g., official Raidiant server)
- A hub for a specific hobby/interest (e.g., book lovers)
- A hub for a specific industry/job role/interest group (e.g., Game Devs, women in gaming0
- An event hub (e.g., for a tournament or game jam)
- A workspace for a company/project
- A space for you and your close friends
Second, ask yourself, “What’s the over vibe of my Discord server? What personality should it have?” For example:
- Professional versus casual
- Owner-oriented versus member-oriented (Who contributes most? Who is at the center of the community?)
- Text channels versus voice channels
- United community versus sub-communities (Will there be role-exclusive channels/activities?)
Remember that you don’t need to pick sides with the above choices. Instead, consider these factors on a spectrum to guide your overarching direction of the server.
Next, we move to specific server needs. Let’s start with your needs as the server owner/creator. For example, do you want:
- Community growth,
- Community engagement,
- Community insights/feedback,
- Direct communication pipeline to the community, or
- Community management/moderation tools?
Finally, what does your community want? What do they expect from your server? Here are a few options:
- Information/useful resources
- Events/activities
- Guidance/feedback
- Casual conversations
- Networking opportunities
- Making new friends
Based on this foundational understanding of your Discord server, you can now assess what kind of channels and roles you need to make. Moreover, you have a grasp on your space’s branding and community management direction.
Step 2: Discord server must-haves
Although different Discord communities differ in their outlook and activities, there are some aspects that every server should have. Unless your hub is only for a close friend group, you must meet certain basic requirements.
- Server rules to ensure the safety of your community and outline moderation standards. (More information on regulations can be found in “Step 5: Server security”.)
- A clear server structure so that members can easily find what they’re looking for.
- An onboarding space where newcomers are welcomed and guided through the server. (Discord offers easy onboarding options in the server settings.)
- At least one, but ideally, multiple moderators. A hacked account or other incidents could always happen while you’re unavailable.
- Moderator-only channels where mods can ask you for help or inform you about incidents.
- Member roles to visually distinguish moderators and potentially other community sub-groups.
Step 3: Channel structure
Equipped with the basics, you can start building your server’s channel structure. You might know that Discord channels can be divided into customizable categories. Within each category, you can place text and voice channels. However, there are also special channel types, such as:
- An announcement channel,
- A rules channel,
- A stage channel,
- An events channel, and
- A system messages channel.
If your server is an openly accessible community, I highly recommend “Enabling Community” in the server options. Otherwise, you won’t have access to all the building and management options Discord provides. Thankfully, Discord makes your building experience as smooth as possible. They explain each feature’s purpose so you can decide if they fit your needs.
To create channels or categories, go to the server drop-down menu. To add a channel to an existing category, click the “plus” sign next to the category. You can also right-click channels and categories to edit, name, or delete them.
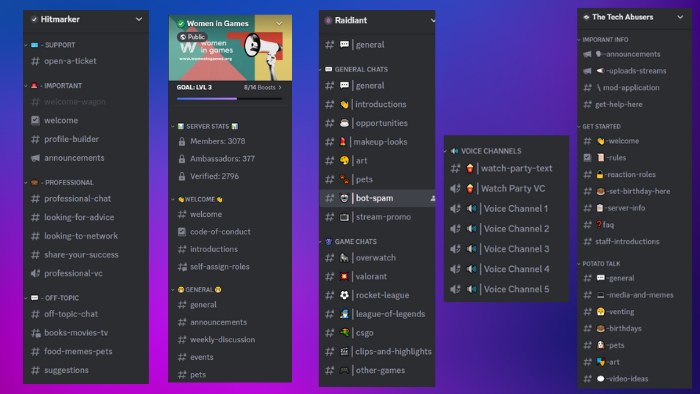
It’s impossible to give building instructions without knowing your exact preferences. Therefore, I’ve collected a few examples to take inspiration from:
Step 4: Roles and permissions
Server roles open tons of possibilities for you and your community. For example, they allow your mods to be easily distinguishable from other members and chat in a private channel. How many and which roles you need depends on your preferences. Your options are nearly endless, but here are some common examples:
- Roles for different member interests (e.g., games or hobbies)
- Roles for server newcomers and veterans
- Roles for different departments in an organization
- Roles for member characteristics (e.g., pronouns, country, a field of specialization)
- Roles for notification preferences (e.g., group pings for announcements, events, or video uploads)
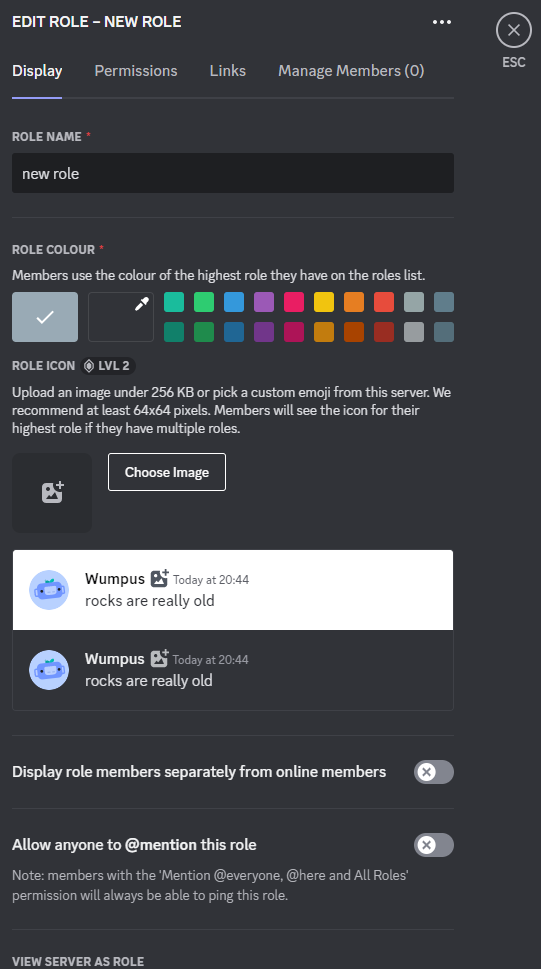
You can manage roles in your server settings. When creating a role, you can give it a name and color (members with this role will be displayed in the role’s color). Additionally, a setting enables or disables members to tag everyone with this role. This feature is excellent for mods or gaming roles, so members can easily find each other. Members can also be displayed separately from online accounts in the member list. Activate this setting for roles that should stand out.
Server roles lead us to permissions. Every role can be equipped with a customizable set of privileges and restrictions. For instance, moderators must be able to access every channel and manage other members. However, granting every member these rights is risky. Members with bad intentions could abuse this power. So, when creating a role, carefully consider how their experience on your server should be enhanced or limited.
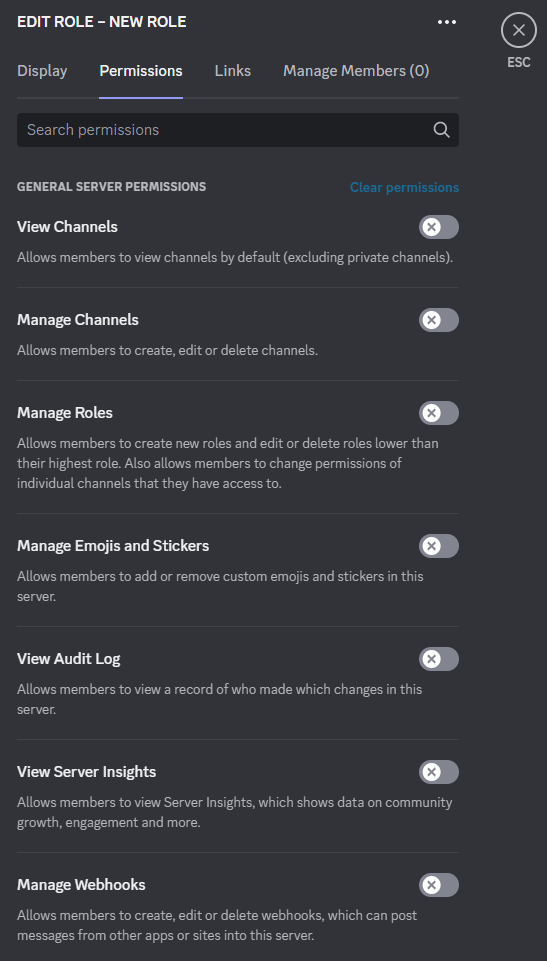
Role permissions can be managed when creating a role or editing existing ones. Thoroughly familiarize yourself with each permission and its implications. Moreover, you may edit permissions for specific channels and categories. To illustrate, an announcement channel should be visible to everyone, but not every member should have the right to make announcements. This can be arranged through channel permissions. Edit the channel and select which server role can do what. Finally, the “private channel” feature allows you to make a channel invisible except for specified roles.
Tip: When managing roles, select “View Server as Role” to experience your server from a specific role’s perspective.
Step 5: Server security
Like most public digital spaces, Discord servers are vulnerable to malicious actions. As a server owner or manager, it’s your responsibility to ensure your community’s safety. Discord offers some helpful safety features. You can find them in your server settings under the “Moderation” section. First is the “Rules Screening.” With this enabled, newcomers must agree to a customizable set of server rules before interacting with your server. In addition, the pop-up window can be previewed.
- Not sure what to include in your rules? Here are some common ones:
- No derogatory comments based on someone’s race, gender, sexuality, looks, etc.
- No spam
- No NSFW content
- [Language] only
- Stick to the theme of each channel
- Respect the mods
- Self-promotion allowed in dedicated channels/forbidden
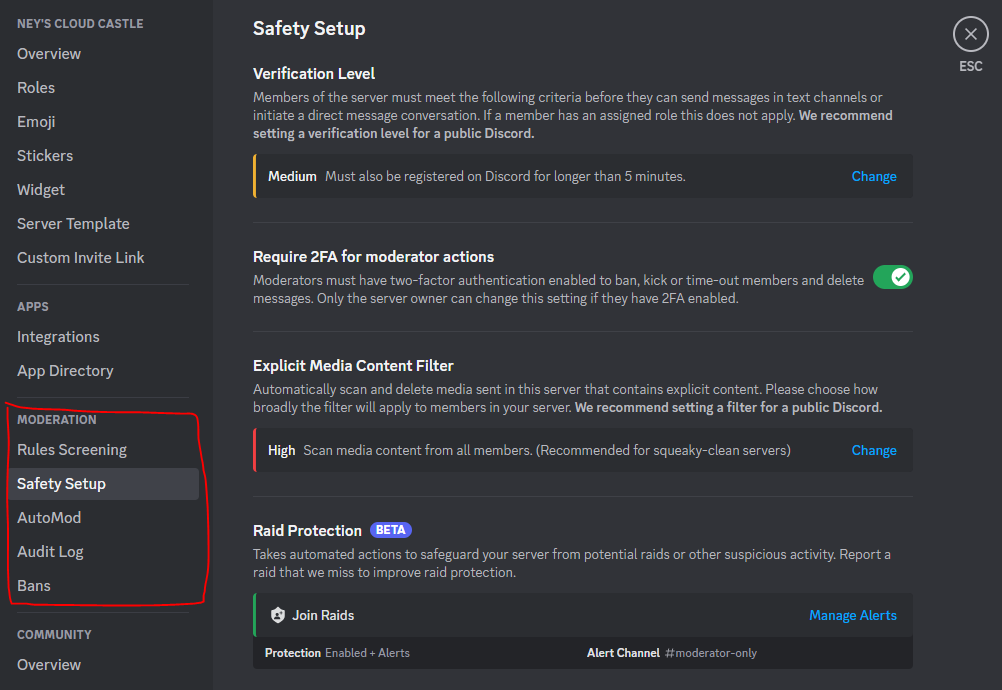
Next, we have the server’s “Safety Setup”. Here, you can manage four security options:
- Verification Level: Members must meet specific verification requirements to chat on your server. For public servers, I recommend medium or medium plus a custom verification method (more on that in the next step).
- Require 2FA for moderator actions: With this enabled, mods must have two-factor-authentification to kick members, delete messages, etc. I suggest enabling this setting. There’s always a chance that one of your mods’ accounts is hacked and does unwanted actions on your server (I speak from experience here).
- Explicit Media Content Filter: Automatically scans media for explicit content. For public servers, medium or high protection is recommended. However, the feature might make mistakes occasionally.
- Raid Protection: Alerts you in case of suspicious activity and raids. Choose a private channel as the alert destination.
Discord’s AutoMod can be configured to block various unwanted behavior, including spam and custom words. I suggest reading through the different features and choosing which are suited for your server. For example, while some servers allow spamming messages, others don’t. In any case, the Block Custom Words option is an invaluable tool to keep your community safe.
The following section is the AuditLog. Think of it as a tracker for all server management and moderation activities. Here, you can stay up-to-date on kicked members, deleted roles, channel management, and more.
Finally, the Bans category lists all banned accounts on your server.
Tip: Make your mods’ life easier by giving them a moderation template for your server. Although moderation is a nuanced practice, some behavior can be categorized and listed in a form to avoid confusion.
Extra tip: Enhance your server’s security by actively including your community in the process. For instance, state in your rules not to share private information, encourage members to notify mods in case of rule violations, or remind them to enable 2FA.
Step 6: Bots and automation
Bots are not necessary for every Discord server. But they can make your life much easier if you want to save time through automation, manage a large community, or have an intricate role system. If you’re new to the world of Discord bots, here are some compelling functionalities:
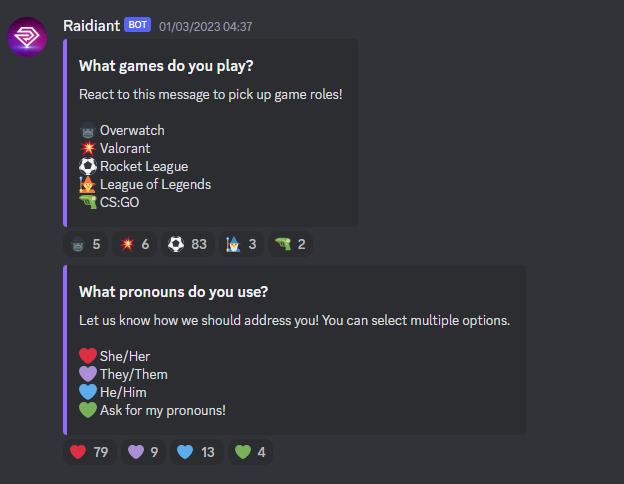
- Allow members to assign themselves specific roles by reacting to a bot message
- Establish custom verification processes
- Help newcomers with onboardingwith automated welcome messages
- Keep track of your server stats
- Play music on voice channels
These were just a few examples, and the possibilities are virtually endless. Feel free to do your own research on the perfect bots for you and their configuration. If you need a little help at the start, I have some common bots for you:
- MEE6 (for server management)
- YAGPDB (for server management)
- Carl-bot (for server management)
- Statbot (tracks server stats)
- FreeStuff (keeps your community up-to-date on free games)
- Green-bot (for music)
- Streamcord (for streaming notifications)
- Simple Poll (for community polls)
- VoteBot (for community polls)
- TweetShift (connects your Twitter to your server)
Step 7: Branding and emojis
We’re getting close to the finishing line! With all essentials set up, you can look for other ways to enhance your server and its purpose. First, your server should reflect your personal brand or that of your organization. Keep this in mind for your server icon, banner, and language.
Furthermore, you have access to more branding opportunities than you may think. For instance,role names can be either playful or basic, depending on your brand. The same goes for channel names. You can customize the look of your channel structure by adding emojis or changing the font. Another nice detail is to match role colors to those in your logo. Finally, consider which server-exclusive emojis match your community’s needs and brand. As a streamer, you can use your Twitch channel emotes. But organizations can also carry custom emotes if it fits their brand.
Final Thoughts
Congratulations, you have created your own Discord server! It might have been a long ride and may not look perfect, but it’s a big accomplishment. Moreover, the more you practice, the better you’ll become. I hope my guide has helped you on this journey!